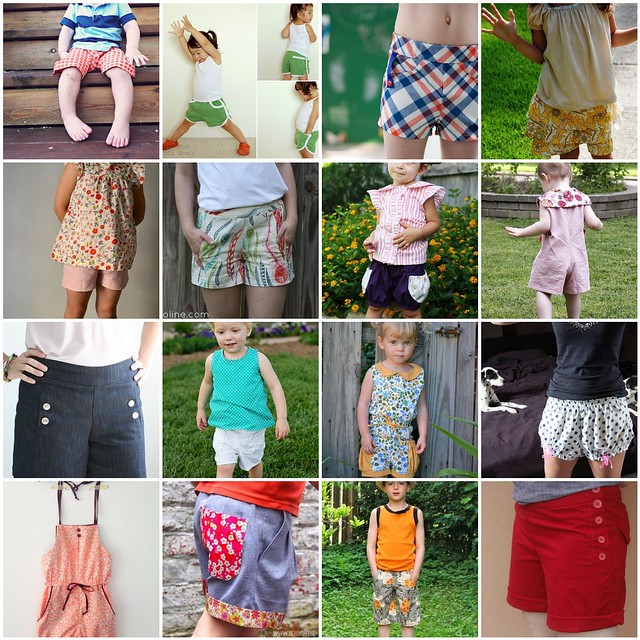
i'm super excited to be sharing the tutorial for these comfy and ready-for-play
reversible knit knot shorts as part of
Shorts on the Line!
you may remember the reversible knit knot shorts from this past spring KCW when
this first pair nearly did me in. thanks to some construction advice from
my pal Kat,
the second pair was a breeze! and i'm happy to be finally sharing the how-to so you can make your own.
first things first... this tutorial would not be possible without
this fab knot shorts tutorial from elsie marley. thanks so much to Meg for her inspiration and for saying, "heck yes! you should totally write a tutorial about making my shorts reversible!!" (or something like that.)
Meg's instructions walk you through tracing a pair of existing shorts or pants for your pattern. to make shorts that are a size 4/5, i used
the MADE kid pants pattern (available for download in a size 2/3). if you are using a woven shorts pattern, you'll want to use one that is a size smaller than your desired shorts size.
![]()
other links that might be helpful in making your shorts pattern:
kid shorts tutorial from MADE or
how to make shorts from a pants pattern from Made by Rae.
to make your reversible knit knot shorts, you'll need to follow
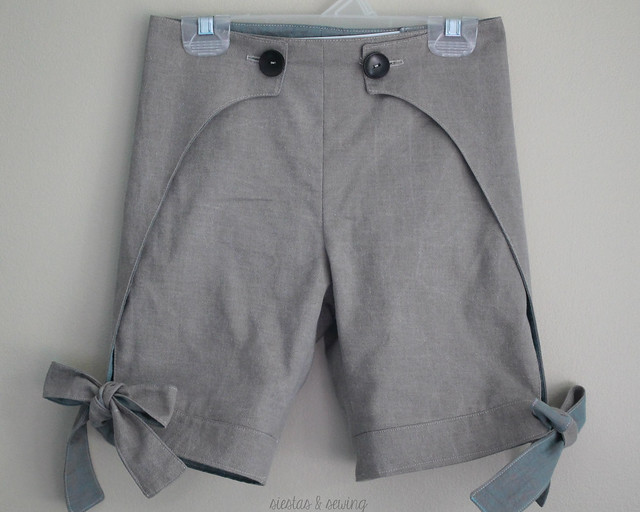
the elsie marley knot shorts instructions through step 14 with a few exceptions, noted here:
step 3. when adding the extension to the bottom of the shorts for your ties, i found that making the tie meet the side of the shorts at a 90 degree angle worked better for this construction (you can see my pattern pieces above).
step 5. no facing necessary.
step 6. cut two front pieces and two back pieces each out of your two fabrics (so you have eight pieces total).
steps 7-14. construct shorts per instructions, skipping any facings-related steps, with first fabric. repeat with second fabric.
you should now have two identical pairs or shorts with unfinished hem, waistband, and tie tabs. and here's where the fun begins.... let's make some reversible shorts!
1. place both pair of shorts on a flat surface as shown (inside out, front of shorts facing up, so that leg openings meet).
2. line up inseam and pin leg openings right sides together (RST).
3. continue to pin RST around leg opening, including tie tabs.
4. stitch all the way around where you just pinned, starting and ending where tie tabs meet the outer leg seam.
5. align second leg opening and pin RST.
6. begin to stitch around leg opening as before, but stop stitch just after crossing the inner leg seam. remove shorts from machine, turn over, and begin stitching where you just ended, continuing until you reach where the tie tab meets the outer leg seam.
7. begin pulling one side of the shorts up over the other, so that wrong sides are enclosed between layers. reach between layers to push out tie tab ends.
*to finish with elastic casing*. align top edges, fold top of shorts and press.
. fold down a second time and press.
. stitch close to bottom fold, leaving an opening for elastic.
. feed elastic through casing, secure, and stitch opening closed.
*to finish with fold-over elastic (foe)*. cut piece of elastic to size desired plus one inch.
. use pins to mark half and quarter distance marks on foe.
. starting at center back, align marked points of foe with side, front, and back seams of shorts.
. fold elastic over raw edge of shorts, making sure both layers of fabric are enclosed, and pin.
. starting at center back, zig-zag stitch first 1/2" to secure elastic to shorts.
. end with needle in the down position.
. grasp first place where foe is pinned to shorts with left hand.
. stretch until shorts lay flat (shorts fabric should not be stretched), and make sure that both layers of shorts are enclosed in foe.
. still holding elastic taut with left hand, grab fabric just behind presser foot with right hand.
. begin to stitch, allowing machine to feed elastic, while continuing to maintain same pressure between the points held by your right and left hands. (this part might take a little practice)
. when you reach the pinned point, repeat process of pulling elastic taut to next pinned point.
. when you reach center back, overlap foe with your original stitches, pin, pull taut, and stitch as you have the other sections.
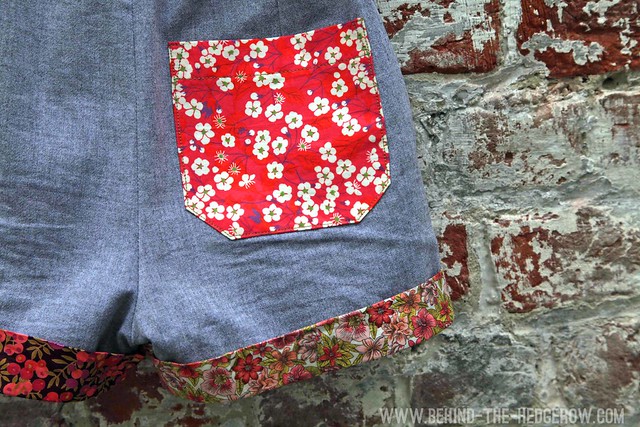
tie some cute knots, and your shorts are ready to wear. inside... or out!
for our high noon summer photoshoot (good plan, mama) we paired B's new reversible knit-knot shorts with a stripey
tumble tee.
also sharing some shorts inspiration today is my amazing
Shorts on the Line co-host, Carla of
small + friendly. whether you want to
make your own chicken coop,
whip up some simple granola, or
clean with a toddler, Carla's
adventures in modern homemaking are sure to help you along the way... and make sure you don't miss
these fabulous crafting and sewing tutorials during your visit.
and i just want to shout a big "thank you!!!" to Carla for being the best co-host a girl could have. this lovely lady is a sweet and kind soul, an inspirational mama, and someone whose friendship i am honored to share. hop over to
small + friendly to say "hi" and see more about these sweet scalloped shorts....
a few more shorts reminders...
you can still
enter to win one of 14 patterns for the
Shorts on the Line week two giveaway.
don't forget to add your shorts to the
Shorts on the Line flickr group... you can enter your shorts up until midnight on july 6 to be eligible to win some great prizes!
Shorts on the Line is sponsored by
Jo-Ann,
Pretty Prudent/
Pellon®, and
Hawthorne Threads.
happy stitching!


.png)