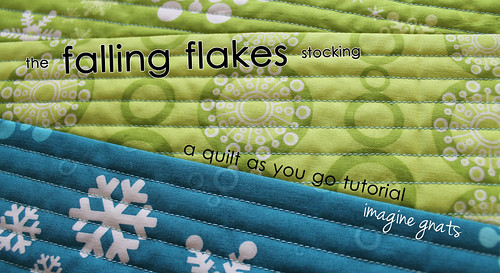
today i'm happy to be sharing the tutorial and pattern for a simple and fun quilt as you go stocking...
![IMG_3308b]()
materials:
exterior fabrics: 1/2 yard plus 2 FQ (or scraps)
lining fabric: 1/2 yard
batting: two pieces, each 15x20"
ribbon for hanging loop: one piece, 6" long
![stocking pattern 1of4]()
![stocking pattern 2of4]()
![stocking pattern 3of4]()
![stocking pattern 4of4]()
*update* stocking pattern available as printable pdf here
to download/assemble pattern from flickr:
click on one section of pattern
in flickr, choose "actions" and then "view all sizes"
in sizes section, click "original"
click "download the original size of this photo"
repeat for remaining three pages
print each page 8.5x11 (verify that 1" test square is correct)
overlap each page .5" and tape together
cut out pattern
exterior stocking back:
1. cut one piece 15x20" of exterior fabric
2. pin fabric to batting piece
![stocking tutorial]()
3. quilt and put aside
exterior stocking front:
4. cut seven pieces 5x15" of exterior fabrics
5. for each of the seven pieces, trim as shown
![stocking tutorial]()
6. place first piece of fabric on batting, pin and quilt
![]()
![]()
7. place second piece of fabric right side down, matching raw edges with last piece (taking care to alternate narrow and wide ends)
![stocking tutorial]()
8. stitch with a 1/4" seam allowance
9. press seam open
![stocking tutorial]()
10. quilt
11. repeat until all seven pieces are sewn and quilted
![stocking tutorial]()
![stocking tutorial]()
*note: if you want to embroider a name on the stocking front, do that now*
![stocking tutorial]()
assemble exterior:
12. with wrong side up, place stocking pattern on exterior stocking front and trace outline
13. place exterior back and front right sides together and pin
14. cut stocking opening line through all layers
15. stitch around stocking on drawn line
16. cut away excess, clip seams along curves
![stocking tutorial]()
17. turn right side out and put aside
![stocking tutorial]()
lining:
18. fold lining fabric so that right sides are together
19. trace stocking pattern onto lining fabric
20. pin around seam lines
21. cut stocking opening line
22. stitch around stocking on drawn line, leaving an opening for turning
23. cut away excess, clip seams along curves
assemble stocking:
24. fold ribbon in half and pin to right side of exterior stocking back
![stocking tutorial]()
25. place stocking exterior (right sides out) inside of stocking lining (right sides in) and match stocking opening line at side seams
26. pin around opening
27. stitch with a 1/2" seam allowance
28. within seam allowance, zigzag over ribbon to reinforce
29. turn right side out through opening in lining
30. stitch opening closed
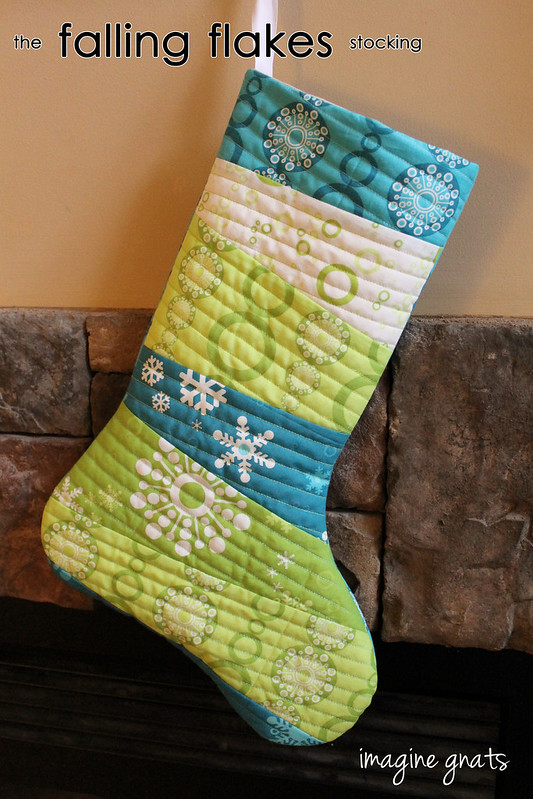
![the falling flakes stocking]()
all that's left is to hang your stocking (with care, of course) and wait for your goodies.
if you make a stocking from this tutorial, please share pics in the imagine gnats flickr group. sample stocking made with Winterkist from Happy Zombie for Lecien, quilted with Aurifil 28wt from the Simply Color collection. pattern and tutorial are for personal use only.
happy stitching!
![]()
![]()
materials:
exterior fabrics: 1/2 yard plus 2 FQ (or scraps)
lining fabric: 1/2 yard
batting: two pieces, each 15x20"
ribbon for hanging loop: one piece, 6" long


*update* stocking pattern available as printable pdf here
to download/assemble pattern from flickr:
click on one section of pattern
in flickr, choose "actions" and then "view all sizes"
in sizes section, click "original"
click "download the original size of this photo"
repeat for remaining three pages
print each page 8.5x11 (verify that 1" test square is correct)
overlap each page .5" and tape together
cut out pattern
exterior stocking back:
1. cut one piece 15x20" of exterior fabric
2. pin fabric to batting piece

3. quilt and put aside
exterior stocking front:
4. cut seven pieces 5x15" of exterior fabrics
5. for each of the seven pieces, trim as shown

6. place first piece of fabric on batting, pin and quilt


7. place second piece of fabric right side down, matching raw edges with last piece (taking care to alternate narrow and wide ends)

8. stitch with a 1/4" seam allowance
9. press seam open

10. quilt
11. repeat until all seven pieces are sewn and quilted


*note: if you want to embroider a name on the stocking front, do that now*

assemble exterior:
12. with wrong side up, place stocking pattern on exterior stocking front and trace outline
13. place exterior back and front right sides together and pin
14. cut stocking opening line through all layers
15. stitch around stocking on drawn line
16. cut away excess, clip seams along curves

17. turn right side out and put aside

lining:
18. fold lining fabric so that right sides are together
19. trace stocking pattern onto lining fabric
20. pin around seam lines
21. cut stocking opening line
22. stitch around stocking on drawn line, leaving an opening for turning
23. cut away excess, clip seams along curves
assemble stocking:
24. fold ribbon in half and pin to right side of exterior stocking back

25. place stocking exterior (right sides out) inside of stocking lining (right sides in) and match stocking opening line at side seams
26. pin around opening
27. stitch with a 1/2" seam allowance
28. within seam allowance, zigzag over ribbon to reinforce
29. turn right side out through opening in lining
30. stitch opening closed
all that's left is to hang your stocking (with care, of course) and wait for your goodies.
if you make a stocking from this tutorial, please share pics in the imagine gnats flickr group. sample stocking made with Winterkist from Happy Zombie for Lecien, quilted with Aurifil 28wt from the Simply Color collection. pattern and tutorial are for personal use only.
happy stitching!