Quantcast
Channel: imagine gnats
Viewing all 906 articles
Browse latest View live

respect and kindness in creativity

$
0
0
i'm going to do this thing here where i practice being open-minded and willing to admit when i am wrong. it's not the easiest thing to do in real life, and the same is true for on the internet. i say this only to ask you to bear with me, and to please see in my words my sincerity, tone of voice being a difficult thing to express no matter what font you're using.


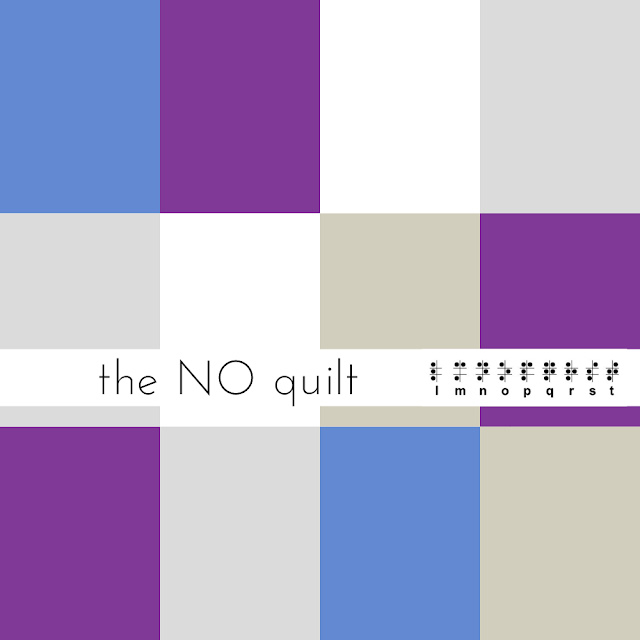
last week, i posted this on my facebook page:


a lot of people stopped by to weigh in. comments were mixed, but mostly constructive. and then there were not-so-nice words for me, which is fine. i made a harsh comment in a public forum and people have an absolute right to share their feelings about that. (though i can't resist noting the irony of nasty public comments left to inform me that such things shouldn't be said publicly.) i have also exercised my right to remove any comments that were offensive and/or non-constructive, but the thread as a discussion remains public.

while i do think that the topic at the root of this is important, no matter how difficult, for us to discuss, i do not think i went about that in a positive or appropriate way. there was no need to use Amy's blog, contest, or designs as an example or public whipping post, as the case may be. i am sorry for having done so. (for the sake of public interest, i have expressed this sentiment to Amy personally as well.)

i've been thinking about creativity, inspiration, ethics, and making mistakes... and i'll share some of those thoughts here. i am so very happy if anyone wants to weigh in, but let us learn from my mistake and not throw anyone under the proverbial bus. any comments doing so will be removed.

creativity is defined as the ability to transcend traditional ideas, rules, patterns, relationships, or the like, and to create meaningful new ideas, forms, methods, interpretations, etc.; originality, progressiveness, or imagination

creativity requires the ability to dissect what exists, to spin it around and turn it on its head, to combine it with pieces of other things and put it back together. creativity means questioning the why and the how, and it knows that there is always a way to transcend the everyday, to make the simple unique, and to use inspiration to see things in a new light. creativity inspires.

my husband can attest to the many times i have been moved to tears because someone has written to tell me how i inspired them. those moments are a huge part of why i write here, and why i design patterns, and why i sew/create/make at all. it is at once incredibly flattering and humbling, and it inspires me right back.

let me be clear that recreation is not inspiration. and that i will never be flattered for someone going out of their way to copy or otherwise recreate my work.

i work hard to create. a new pattern, for example, requires countless hours that could otherwise be spent with my family (or reading a good book!) as well as money, actual cash money i pay for a myriad of things and hope to make back when the pattern is released. if it's a free pattern or tutorial, i hope that you like my stuff and come back and buy something some other time.

yes, i love what i do, but it is also a business. it is a business that helps my family keep the lights on, and someone copying or recreating my work puts that in jeopardy. so, no. i am not flattered by that.

regardless of how i would feel about someone copying or recreating my work, there's not much to stop anyone from doing so. there is very little legal protection with regards to design in this industry, and while you may be confident that copyright will protect your creative ideas, that is very rarely the case.

so what does that really mean?

well, it means that some people will say that copying is ok because it is not technically illegal. i do find that logic to be absurd. let us not substitute "what i can get away with" for "what is the right thing to do."

in theory, it also means that designers are given the benefit of the doubt that they came up with ideas on their own, and not as a result of recreation or copying. it happens, i'm sure more often than we think, that multiple people design items separately which are basically the same.

when two of these people with a very similar design inhabit the same small sewing blogosphere, it gets tricky. because it is so easy to jump to defensive and territorial. and sometimes when you're upset, things aren't said in the nicest way, and it's easy to forget that on the other side of the equation is a person, and that this other person isn't very different from you.

i say this with the special knowledge of hindsight... did you read that part up there about that stuff i said that wasn't nice? yeah, i basically did the same thing and it wasn't cool. the situation is a little different, but it's definitely all related.

again, i am reminded that everyone has a story. i don't know your story, and i shouldn't suppose to know the reasons behind your actions (or the inspiration behind your design). what i do know is that if the tables were turned, i would want you to give me the benefit of the doubt, and i have an obligation to do the same.

please, let us treat each other with kindness and respect, even though we know that sometimes we'll screw up and say the wrong thing. it starts with me, and it starts with you.

some related links you might find interesting:
Knowledge, a Powerful Tool by Kay Whitt
When Patents Attack from This American Life
on Copyright by Knitty
article about Bullies by We Shall Sew

thanks for reading and happy stitching!


tumble tee tour: day ten

$
0
0
i can't believe it's already the last day of the tumble tee tour!! for the last two weeks, a bunch of amazingly talented bloggers have been showing off their versions of my newest pattern, the tumble tee. don't miss all of the fun, kid-friendly, and unique interpretations of this easy-to-sew pattern.

our tour guides today are...


Celina is always sharing something new and lovely. for starters, she always knows about the most adorable things... like these handmade toys or these adorable pajamas. she shares some great DIY projects, like these neon shoes or this DIY wrapping paper you can make with the kids. and please tell me you haven't missed her alphabet collection: style academy post! it's the must see back-to-school 2013 post!!


between Stef's sewing adventures and craft archives, you're sure to be inspired by this girl. and of course she throws a fab party too... perhaps one with this six layer rainbow cake? i love these bubble pocket shorts that she stitched up for Shorts on the Line, and she shared the tutorial for a beautiful lined lace skirt with invisible zipper as part of Skirt Week. and lucky you! you can now stitch up her princess dress sewing pattern as part of the first five and ten designs ebook.

the tumble tee is a color-blocked knit dress with built-in cap sleeves and an easy fit. with both dress and shirt lengths, as well as multiple seam finishing options, it is easily customized. whether you wear your tumble tee with jeans, shorts, leggings, or as comfy pj’s or a nightgown, this pattern is sure to be a wardrobe staple for years to come. get your tumble tee pattern here!

happy stitching!


shop news: this just in!

$
0
0
i'm so excited that my first shipment of beautiful japanese fabrics has arrived! we (me and the mouse in my pocket) were so excited that we couldn't resist stitching up some new dresses for the girls over the weekend.


now listed in the imagine gnats shop, you will find a selection of beautiful cottons from yuwa... including these dreamy cotton lawns. i love the vintage-inspired color palettes, they could not feel any nicer, and at less than $20/yard, these prints are a great alternative to pricier cotton lawns.


the girls couldn't resist some supermodel posing in their new dresses... oh, boy. Brenna's wearing a lined version of the tumble tee dress, and you can find the full tutorial for making your own here.


and these sweet faces? double oh, boy! they both have so many faces, each with more expression than the last. tomorrow is Kahlin's first day of the third grade and Brenna starts kindergarten! i can hardly believe that summer break is over, let alone that they're looking so grown-up.


i let the girls each pick a fabric for a dress out of the new yuwa cottons, and i love what they chose. Brenna picked this navy floral cotton lawn (i'm pretty sure it's my favorite too!) and Kahlin chose this fun cat and bird cotton print, which made for a pretty sweet dress. a sweet dress perfect for goofing around in, that is!


head over to the imagine gnats shop to get your fill of fabric goodness! or you can find me here on etsy.


happy stitching!


tutorial: sew a lined tumble tee dress with woven fabrics

$
0
0
thetumble tee has gone woven! with a lining and everything... fancy, yes? and i'm going to show you how to make your very own!


with all of those pretty new cotton lawns in the shop, i couldn't help but to stitch up a few new dresses for my girls. i wanted something simple with classic lines that would show off the lovely prints... i confess that i searched through my pattern stash and my pinterest boards before realizing that the tumble tee was the perfect solution!

so grab your favorite print and a pretty lining (i used batiste here, but a lightweight muslin works well or you can use a fun cotton print or solid for a pop of color on the inside)... the yardage requirement for main fabric is the same as called for in the pattern, plus remember that you'll need that same amount for the lining fabric. you'll also need a strand of perle cotton and one button.

instructions:
1. print and assemble pattern piece A for size needed. (all seam allowances are 1/4". if you prefer using a larger seam allowance, cut pattern one size larger and use 1/2" seam allowance.)

2. cut two each of main fabric and lining fabric. cut one each on fold (use dashed line as fold line) main fabric and lining fabric.

3. with right sides together (RST), stitch main fabric front to back pieces at shoulder seams. repeat with lining fabric.


4. press seams open.

5. with main fabric and lining fabric RST, pin around arms and neckline.


6. stitch arms, beginning and ending at side seams.

7. mark point on center back seams 3" from raw edge of neckline. stitch from one point, pivoting to continue around neckline. end at marking on opposite center back seam. backstitch at beginning and end to secure seam.


8. clip corners and curves.

9. turn right sides out. press arm holes and front neckline only.


10. match the back center seam of main fabric where stitches end. folding back lining fabric so that it is not caught in the seam, stitch main fabric from where stitched end to hem, backstitching at beginning to secure seam.


11. repeat with lining, taking care not to catch main fabric in seam.


12. turn right sides out.


13. press back neckline, and press back center seam open.


14. fold main fabric up so that side seams of main fabric form continuous line with side seams of lining fabric, meeting at the bottom of the arm hole.


15. pin raw edges, starting in center to match seam lines. stitch in a continuous line from hem to hem.


16. repeat for other side.

17. hem lining fabric: fold under 3/4" and press, fold under 1" and press, then stitch.

18. hem main fabric: fold under 1/2" and press, fold under 3/4" and press, then stitch.

19. tie a knot at end of perle cotton strand.


20. with needle between the main and lining fabrics, go out and come back in to center back seam to form a loop.

21. on interior of dress, tie knot to secure loop.


22. sew on button.


23. wear!


fabric shown is yuwa cotton lawn in light blue floral, now available in the imagine gnats shoptumble tee pattern available here.

happy stitching!


tutorial: sew a tumble tee with woven fabrics v.2

$
0
0
this mod, notched-neckline version of the tumble tee shows another great way that the pattern translates into woven fabrics. because this version of the dress doesn't require the back pattern pieces to be seamed (as in the tumble tee goes woven v.1 tutorial), it's a great opportunity to showcase bold prints.


for this mod tumble tee, you'll need two fabrics, one main and one lining. i used quilting cottons for both the main and lining fabrics of this version, owl fabric shown is from Jo-Ann and the lining is Moda Bella solid in peony. a lightweight muslin or batiste would also work well as lining, especially for thinner main fabrics. the yardage requirement for main fabric is the same as called for in the pattern, plus remember that you'll need that same amount for the lining fabric.

this tutorial will also show you my preferred method for garment finishing... with jersey knit strips! i like the jersey knit finishing method because the jersey gives even more stretch then woven bias tape (which helps to keep the outer fabrics from puckering), it feels soft on the inside, and doesn't require finishing of any edges. you will need a 1" wide strip of jersey knit (length needed depends on size made). should you prefer to finish your seams more traditionally with bias tape, you can find the how-to for bias tape finishing here.

instructions:
1. print and assemble pattern piece A for size needed. note: all seam allowances are 3/8".

2. cut two each on fold main fabric and lining fabric.

3. with right sides together (RST), stitch main fabric front to back at shoulder seams. repeat with lining fabric.

4. press seams open.

5. with main fabric and lining fabric RST, pin around neckline.


6. with a water soluble marker (or other marking tool), draw line straight down 3" from center point of front neckline. draw two lines starting at end of first line back to neckline, each ending 1" outside of center point.


7. stitch around neckline with a 3/8" seam allowance, pivoting to continue on drawn lines as shown.


8. clip curves and corners around neckline. clip close to bottom of "v" without cutting stitches.


9. with main fabric RST, align and stitch side seams. clip curves beneath arm, and press seams open. repeat for lining fabric.

10. turn garment right sides out and press neckline.


11. align main and lining fabrics around arm and pin.

12. place strip of jersey knit so that wrong side of jersey faces right side of main fabric, and pin around armhole.


13. overlap jersey by 1/2" and trim excess.


14. stitch around arm hole.


15. press jersey and all seam allowances away from sleeve.


16. fold jersey and seam allowances to inside of garment so that jersey does not show on outside and pin. (alternate: fold so that a small amount of jersey shows on outside for a faux-piping look.)


17. topstitch around arm. trim jersey on inside if desired. (note: because of the way we place the jersey, it will curl towards the lining fabric, not towards the outside of the sleeve where it would be visible. the jersey edges will not fray, so no finishing is necessary.)


18. hem lining fabric: fold under 3/4" and press, fold under 1" and press, then stitch.

19. hem main fabric: fold under 1/2" and press, fold under 3/4" and press, then stitch. note: i used a blind hem for my outer layer, which is my preferred technique for a curved hem... full blind hem tutorial coming soon!


want to make your own woven tumble tee? check out the selection of pretty cottons now available in the imagine gnats shoptumble tee pattern available here.

happy stitching!

sewing trends for Sew, Mama, Sew!

tumble tee tour wrap-up

$
0
0

tutorial: sew a blind hem

$
0
0
i promised a blind hem tutorial, and here it is! today, i'll show you step-by-step how i did the blind hem on this woven tumble tee dress, including a little gathering trick to make curved hems easier to handle (no matter how you're hemming).


of all of the possible hems out there, the blind hem is definitely my personal favorite. believe it or not, it's actually quite forgiving, which makes it a great option for thin fabrics and knits as well as quilting cottons. and once you get the hang of the seemingly tricky fold you need to make it all come together, you'll wonder why you didn't learn it sooner!


instructions:

1. beginning at center front of skirt, stitch with a gathering stitch 1/2" away from raw edge, ending at center back of skirt. starting about an inch away from where last stitch ended, stitch from the center back to center front, ending about 1" before the first stitch starts.


2. gather the stitches ever-so-slightly to account for the curve in the skirt, mostly at the edges. in some cases, simply the process of stitching will gather the fabric enough.

3. turn skirt inside out. fold up bottom edge (wrong sides together) and press along stitching line.


4. fold up bottom edge by 3/4" and press.


5. beginning with hem folded and pressed in place, fold under so that the right sides are together, and inside of hem sticks out below fold approximately 1/4". pin folded hem in place. (pause or replay slideshow to see in detail, or you can view the individual photos here.)


6. continue around hem in same manner, folding and pinning so that entire hem is folded evenly and pinned in place.


7. attach your blind hem presser foot and set machine to blind hem stitch, per manufacturer's directions.


8. with wrong side of garment facing up, begin stitching with the center bar of the blind hem foot aligned with fold as shown. most of your stitches will fall on the right side of this bar (and stitch only through the interior portion of your folded hem), while every fifth or sixth stitch will zigzag over to stitch through all layers.


9. when finished, the line you have just stitched will look like the photo above. turn your garment over to the right side and it will look like the photo below, with the hem folded up over the exterior of the skirt.


10. fold the hem down. you will see little lines where the thread caught all of the layers of fabric.


11. press well... don't be afraid to tug on the hem to get the stitches to pull through and lay flat.


and there you have it, a beautiful (curved, even!!) blind hem. note: i am perfectly happy to be held responsible for the fact that you will soon want to blind hem all. the. things. don't try to hide it. blind hem and be proud!


happy stitching!


Bake Sale for IRSF

$
0
0
i'm sure i don't mention this here nearly as much as i should, but my husband really is the best person i've ever known. he supports all of my crafty, creative, and possibly absurd endeavors without reservation, and i'm glad to be able to return a tiny bit of the favor here today... and what do you get out of the deal? baked goods! yep, because you're pretty awesome too.

last week, Nick came home from work and informed me he needed to go get oodles of rolls of pennies from the bank for a charity penny war at work. um... ok. they're raising money for the International Rett Syndrome Foundation, in honor of a co-worker's daughter who has Rett Syndrome.

dozens of penny rolls later, Nick mentions the idea of a bake sale. you see, he makes a mean baked good, and occasionally i convince him to get them out of the house he sells them to other people. he made the baked goods for our wedding reception, has sold at local festivals and craft shows, and he once made lemon bars for a stranger's wedding reception in Seattle (via his etsy shop). 


because everyone deserves a fun logo (and someone loves a graphic design challenge), Llamas and Lemon Bars was born. though we haven't been dedicating much of our free time to baked goods lately, i always love the opportunity to taste test some treats :) so, let's all gain a few pounds and raise money together!

about the baked goods: "At Llamas & Lemon Bars, we always use high-quality organic ingredients because we support sustainable and less energy-intensive methods of growing food. In an effort to minimize our footprint, we also source locally produced organic ingredients whenever possible. You'll never find any added preservatives or flavorings in our baked goods or sweets. We believe that reducing chemicals in the soil and on your table is both good for you and tastes a whole lot better!"

available items:Chocolate Chip Blondies, Pecan Shortbread Brownies, and Cranberry Blondies (i hear they have more fun). each individual batch is $24 plus shipping, and all proceeds will be donated to the International Rett Syndrome Foundation.

sale details: the bake sale will run from now until friday (august 30) at 9pm est. baked goods will be made in order of purchase, and all baked goods will ship priority mail no later than monday, september 9.


please let me know if you have any questions, and please share!! you can find all of the available bake sale items here in the Llamas and Lemon Bars etsy shop and follow Llamas and Lemon Bars here on facebook.

thank you for your support!


tutorial: jersey infinity scarf

$
0
0
this quick and easy jersey infinity scarf tutorial is the perfect accessory to transition your favorite summer wardrobe staples right into fall. plus, scarves make great gifts, so you just might need to whip up a few.


here's the step-by-step tutorial *plus* some tips for sewing with knits:

required materials:
. 2/3 yard knit fabric (fabric shown is Patty Young for Michael Miller)
. ballpoint needle (also called jersey or stretch)
. thread, sewing machine, and notions

tips for sewing with knits:
. take care to not pull or push fabric while stitching, letting the machine feed fabric
. use a ballpoint needle
. if available, set machine stitch length to “stretch” (if “stretch” setting is not available, use a narrow small zigzag stitch)
. if you have an overcasting foot, use overcasting stitch on "stretch" setting (this is the option i most often use with knits)

instructions:

1. fold fabric right sides together, lining up raw edges on long side.

2. stitch along long raw edge (use 1/4” seam allowance or overcasting foot).

3. trim selvage off both ends of tube, so that raw edges are perpendicular to sewn seams.


4. reach into one side of the tube and pull second raw edge up through tube to meet the first. raw edges will now be right sides together at opening.


5. pin around raw edges and stitch, leaving a 2” opening for turning.


6. turn scarf right side out.


7. hand-stitch opening closed *or* pull seam away from fullness of scarf and machine stitch close to folded edge. and you’re done!!

if you make a jersey infinity scarf, i'd love to see. you can email me, post on facebook, or share your pics in the imagine gnats flickr group.

happy stitching!


*this post originally aired on the sewn studio blog*


tutorial: simple arm band DIY

$
0
0
looking for a comfy, washable, and easy-to-make workout arm band to hold your phone or mp3 player during your next run or jazzercise class? oh, good... because here it is!

tutorial: workout arm band || imagine gnats

when Nick started running a few months ago, we went through quite a few versions of arm bands for exercising, trying to find something that was comfortable and actually worked. not happy with the options available for purchase, we took to the interwebs.

we found a tutorial for The Most Comfortable iPhone Armband EVER, and it blew. my. mind. if you're going for super simple, it's for you. we tried it out, but found ourselves in a sweaty situation with one very soggy arm band, so we set out to improve on the fold-up cuff style arm band.

to make your own simple arm band, you'll need a bit less than a yard of 1/2" elastic and a smaller-than-a-fat-quarter piece of fabric. but what kind of fabric? it needs to be stretchy, and ideally it will do something to help with that whole sweaty situation. unable to find decent water-wicking fabrics to purchase by the yard, i bought an XXL workout shirt on clearance and cut it up for fabric. that one shirt yielded enough fabric to make eight arm cuffs, so it's an extra bargain if you know an octopus. you could also salvage some worn-out workout gear and make yourself an upcycled arm band.

instructions:

1. measure around your upper arm. (for reference, i used a measurement of 12")

2. cut a piece of fabric/shirt measuring 10" tall by {arm measurement less 1"} wide.

important: make sure that the width of fabric is what has the greatest stretch!!


3. cut two pieces of 1/2" elastic each {arm measurement less 2"} long. i used fold-over-elastic because it's softer than most braided and non-roll elastics, but still holds its shape. knit elastic would also work well here.


4. pin elastic to the wrong side of fabric at top and bottom edges.


5. pin at first edge. with no stretch, pin again 1" in from raw edge. repeat at other end of elastic, and then match center point of elastic with center of top/bottom seam and pin.


6. stitch elastic to fabric along raw edges. for this step, i used my overlock foot and stitch, but you can also use a zigzag stitch.

note: do your best to not stretch fabric as you are sewing. for center section, stretch elastic just enough to match length of fabric, keeping edges even while sewing.


7. fold edges in so that elastic faces wrong side of fabric and pin.


8. using a zigzag stitch, stitch close to raw edge, making sure that you stitch through all layers.


9. fold arm band, wrong sides together, so that remaining raw edges match up. pin and stitch with a 1/4" seam allowance.


note: because the edges are so much thicker, you may want to stitch in two steps. starting in center, stitch to one edge, backstitching at end. turn over, start by overlapping first stitch, and stitch to other edged, backstitching at end.


10. tun arm band inside out. finger press and pin (RST) at the seam you just made.


11. stitch seam with a 3/8" seam allowance, using a straight stitch or very narrow zigzag stitch. (again, stitching in two steps may be easiest here.)


12. fold arm band over itself so that it forms a cuff.


13. offset seam, pushing seam allowances away to opposite directions and pin.


14. starting in the middle of the band, stitch just in between offset seam allowances through two layers. backstitch and start about the middle of the cuff, ending (and backstitching) at elastic.


15. put that baby on! run in to bathroom and take photo, because you're actually home alone. (whaaa?)


16. after school, have five-year-old take pictures. share the one that isn't completely blurry.


17. after dinner, make ask husband nicely to put on workout clothes and pose on the porch. realize this is a great plan because this particular arm band has already clocked a few dozen miles. it works!


(plus, this blog needs more handsome man eye candy anyway... amiright?)


here are some other great tutorials for handmade ways to take your phone/mp3 player along with you:
The Buff Cuff by luvinthemommyhood
DIY Armband for Touchscreen Devices by Melly Sews
Running Belt DIY by Sewbon for The Sewing Rabbit

Martha Stewart - American Made 2013 - Nominee Badge

happy stitching!


roly-poly round-up

$
0
0
i'm quite certain that the roly-poly will always hold a special place in my heart... my first pattern release, and absolutely a labor of love.


since the pattern release and the roly-poly-along, there have been so many amazing versions of this pattern made, so i thought it was about time to share some of the photos of your lovely roly-poly pinafores that have been shared in the imagine gnats flickr group.

roly-poly round-up

1. #rolypolypinafore Sundays rock, 2. Roly poly pinafore., 3. Roly-Poly pinafore tunic, 4. Roly Poly Pinafore!, 5. pinwheel back, 6. itty bitty2, 7. Roly Poly Pinafore | Imagine Gnats pattern, 8. New shirt! Pattern by @imaginegnats, 9. Roly-Poly Pinafore

roly-poly round-up

1. Roly Poly #2!, 2. Nurse Costume, 3. Roly Poly Pinafore & Parsley Shorts, 4. Roly Poly Clouds 2, 5. Roly Poly Pinafore, 6. Roly Poly Pinafore, 7. Roly-Poly Pinafore, 8. Roly Poly Pinafore, 9. roly poly hot dog back, 10. Briar Rose Pinafore, 11. roly-poly-pinafore, 12. Roly Poly Pinafore, side 1

the roly-poly is a pinafore-style tunic top with crossover back that fastens at the shoulder with two buttons. it features clean lines, neckline pleat, optional in-seam pockets, and is reversible. whether you layer your roly-poly with a colorful cardi and skinnies, pair with your favorite summer skirt, or use as a keep-clean smock, this tunic fits perfectly into the wardrobe of the easy, simple days of childhood.

get your copy of the roly-poly pattern right here, and happy stitching!


selfish sewing week: free planner printable

$
0
0
less than three weeks until selfish sewing week, and today i'm sharing with you a free printable selfish sewing week planner! this planner is a modified version of my weekly blog organizer and calendar.


fonts from Kevin and Amanda

the selfish sewing week planner includes weekly countdowns, space to check off your daily time during the week, and plenty of space to make notes about what you'd like to sew and what you need. how to use the original weekly blog organizer and calendar here.

happy stitching (and scheduling)!


fabric: all about double gauze

$
0
0
what is double gauze? one of my favorite fabrics to work with, double gauze has an elegant simplicity and a soft hand, all made possible by an ingenious construction method.

fabric: all about double gauze || imagine gnats

to know more about double gauze, first we must know, "what is gauze?" gauze is a thin fabric with an open weave, which gives it a lovely drape but also results in the fabric being quite sheer. it is most often constructed with a "leno weave", which allows for the looseness without distortion or slipping of threads.

double gauze is, very simply, two layers of gauze... simplicity at its very best, that is. two layers of gauze are tacked together at regular intervals with little stitches that are undetectable from the right side of the fabric. this allows the two layers of gauze to behave as one, like a lining that's been basted to your main fabric, and two layers of the sheer fabric are enough to overcome the translucent properties of a single layer.

the loose weave allows for a breathable and airy fabric which is oh-so-soft, while the double layer lends a bit of weight that gives it a nice shape. the drape of a double gauze is similar to that of shot cotton or a light-weight linen. double gauze does tend to wrinkle during wear, though not as much as linen.

now, what should you make with double gauze? i vote everything! summer garments are especially nice, since the fabric is lightweight but not see-through, eliminating the need for separate linings. but don't count this fabric out for the colder seasons...double gauze makes for wonderfully soft and cozy fall/winter garments and accessories. and who wouldn't enjoy spending a chilly day in a pair of double gauze pj's or curled up on the couch under a double gauze quilt? some double gauzes are even available in brushed cottons, combining the best of double gauze and flannel.

here are fifteen fabulous double gauze projects from around the interwebs (links to full posts listed below):


row one:
Nani Iro scarf by materials & method
Echino Bubble Dress by StraightGrain
Painted Portrait Shirt by Fancy Tiger Crafts
The Simone by casa crafty

row two:
Tumble Tee by miss matatabi
Infinity Scarf by Fresh Lemons Quilts
Lap Duvet (tutorial) by the purl bee

row three:
June Bug Dress by Caila Made
Fiona's Double Gauze Scarf (tutorial) by The Village Haberdashery
Reversible Spring Coat (tutorial) by you & mie
A Springtime Ayashe by skirt as top

row four:
Pajama Party by Cirque du Bebe
Dottie Leia Dress by verypurpleperson
The Honey Blouse by Make It Perfect
Aqua Double Gauze Washi by Made by Rae

you can click here to see more photos and information about my {double gauze} NO quilt,


and click here for more about my Nani Iro double gauze staple dress.


i'm happy to say that a dozen or so bolts of double gauze are expected in the imagine gnats shop within the next few weeks! including some solids, which i find pretty exciting. hello, not-so-basic wardrobe staples!!

and because variety is the spice of sewing, where else can you find a lovely selection of double gauze?


happy stitching!


quilting: the {double gauze} NO quilt

$
0
0
i made a quilt out ofdouble gauze. that's right, the quilt top, backing, and binding are all double gauze. it feels luxurious and elegant... but most of all, it is just downright yummy.


this very lovely double gauze quilt is part of the braille quilt-along hosted by Thomas Knauer Sews, and has a very simple and not-so-secret message. (spoiler alert: the message is "NO")

when i first started brainstorming about what to make with this quilt, every idea was more complicated than the next; nothing unusual there. i must have been having a particularly good day (i wason vacation at casa moxie at the time) because i somehow realized that my plan to quilt a giant crossword puzzle filled with synonyms for the word "ostensibly" (true story) was not really a good one.


there's kind of a race in my head sometimes... you know, to the next great idea. how big can it be? how complicated and fabulous and new-to-the-world? but bigger is definitely not always better, complicated isn't always more complex, and there is joy to be found in a simple and well-executed idea.


so i said NO to all of the crazy plans, and set out to find a simpler answer when it occurred to me... i already had it. a quick google search to check the braille symbols for no, and i was well on my way to a fabulous quilt.

along with some double gauze scraps i had on hand, the lovely miss matatabi had a fabulously timed remnant sale that enabled me to get enough prints to put together the quilt top. i used 3 yards of this double gauze from my own little shop for the backing, and scraps from here and there (including a pretty purple and coveted piece of far, far away) make up the binding.


quilt stats: each of the blocks in this quilt measures approximately 12x18", and the full quilt is about 50x55". i used straight-line quilting at about a 2.5" interval. well, straight-ish... quilting on double gauze can be a bit tricky and i wasn't about to drive myself batty going for perfection against all odds, especially on a quilt devoted to the idea of simplicity.


i wish that you could all snuggle with this quilt and feel how great it is to say NO :) trust me, it's good! you should try it...

during september, these other wonderful quilty peeps will be sharing their braille quilts: Cassie of Elegantitus, Jill of Made With Moxie, Kelley of Casa Crafty, and Kat of Sew Chibi. trust me, you can't wait to see what they've all come up with. i've seen some sneak peeks and they are fabulous!!

you can get your fill of Thomas's latest collection, Thesaurus, from the lovely Fat Quarter Shop.

happy stitching!


the bess top

$
0
0
i just want to yell it from the rooftops... the bess top pattern is now available!! i am downright giddy about this because i just know that you will love making and wearing this pattern. run to the imagine gnats shop to get very own copy! or stick around and read a little bit about it first, whatever floats your bloat ;)


what i love best about this pattern is what a range it has. not only can make your bess top as a shirt, tunic, or dress... but this pattern comes in us womens sizes two through twenty! i feel like the indie pattern designers market doesn't have a lot of great options for non-single-digit-sizes-women, and i am really proud of how hard i worked to put together a pattern that has been sewn and loved by women on both ends of the spectrum. because we all deserve fabulous diy wardrobe options, thick and thin alike! 

the bess top has an easy fit that is designed to flatter a variety of body types. both shirt and tunic lengths have a subtle hi-lo hem, and the dress is designed to hit at the knee. all options feature pleated yoke formed by a wrap-around sleeve, and tunic and dress lengths include optional in-seam pockets. the neckline, sleeves, and hem (for shirt and tunic lengths) are all finished with jersey knit, a technique that gives a clean, easy finish, allowing for a well-stitched curve while providing stability.


coming up this week, i'll be sharing some fabulous versions of the bess top that my pattern testers made as well as fabulous ways to alter your bess top for even more fun from Katie of Kadiddlehopper, Emma of Hello Beautiful, and Tasha of I Seam Stressed.

pattern details:
includes US womens sizes 2-20
sewing level: intermediate, reason: y-seam construction
pattern pieces and instructions are available as instant download and include: images of the finished pattern, step by step instructions with photographs, sewing tips, and full-size printable pattern pieces.

i have to give a huge, giant thank you to my incredibly lovely models, Ashley and Bridget, who are every bit as beautiful inside as out. they rocked this photo shoot and make my tops look so good!


in these cover shots, Ashley is wearing the bess top dress in a size 6 made with a striped rayon shirting from Jo-Ann and a contrast yoke in a quilting cotton from Art Gallery Fabrics. Bridget is wearing the bess top tunic in a size 16 made with a gorgeous ikat rayon challis, also from Jo-Ann. both tops have in-seam pockets, and Ashley's dress is fully lined with the method shown in this tutorial.

and here is yours truly, in some awesome headshots by marissa bowers art*design*photo, wearing the first version of the bess top, in a dreamy kokka double gauze from Sew to Speak. because it's always nice to remember where something started, right?


you can get your bess top pattern right here!!! happy stitching!


sewing: color-block your bess top

$
0
0
want to color-block your bess top? it's so simple, and you can use this technique to customize your bess top in so many ways! i'll show you a few that i've made and give you all the info you need to make your very own. plus, this same technique will work with most other simple shirt, tunic, and dress patterns.


can you believe that this color-blocking option did not occur to me when i first drafted the bess top pattern? a few versions in, i set my sights on somehow using a 1/2 yard piece of Heather Rossdouble gauze in a bess... so, i paired that 1/2 yard with two colors of shot cotton in this shirt, and the color-blocked bess top was born! (all of the lovely shot cottons in this post are by Kaffe Fassett, purchased from Fabric Shack. and they're dreamy!)


to color-block your bess top, follow these steps:

1. draw a horizontal line on the back pattern piece where you want your seam to be, making sure that this line forma a 90 degree angle with the fold line.
2. cut your pattern piece apart at line.
3. on each of your two new pattern pieces, add extra 1/2" where you just cut for seam allowance.


4. cut out fabric and stitch together along seam with 1/2" seam allowance.
5. press seam toward neckline, and topstitch.
6. construct bess top per pattern instructions.


for this bess top tunic, i brought down the color-blocking seam line (due to material constraints!), and used the same color shot cotton on both the front and back. this fabulous print i found at Sew to Speak, and i love the little deer hidden amongst the leaves. 


in this bess top dress, i used a quilting cotton from Art Gallery Fabrics as my contrast panel, which give a nice structure to the flowy dress body (rayon shirting from Jo-Ann).


have you started planning your first bess top yet? get your pattern here, and find more information about customizing your bess top here.

happy stitching!


craft book month: Mr. Grumpy in a Frog Suit

$
0
0
today, it's all about books! i'm sharing the free eBook i made (with help of the whole family), the craft i stitched up, and the craft book that inspired it all... as part of the 3rd Annual Craft Book Month at Craft Buds.


i purchased We Make Dolls! by Jenny Doh last winter because i just couldn't resist. there's a frida doll, tattooed strong man, felted farm animals... well, let's just say that this book is full of great projects. that said, i'm not sure that i ever intended to make any of them. really, i just collect books. so i look forward to this series as an excuse to make something i might otherwise skip.

one look through this book was certainly not enough to decide what project to tackle. really, the photos, directions, and patterns are all fabulous. Jenny did an amazing job curating this book and the designers are all truly inspiring. in my (completely unpaid) opinion, this book is well worth adding to your collection.

while deciding what to make, i showed the book to Nick, who very kindly volunteered to take a grumpy plush mascot to work. and this fabulous Mr. Grumpy character designed by Nichol of Pink Cheeks Studios certainly fit the bill!!

(by the way, you have to check out Nichol's etsy shop... personalized plush? i want!)


so, yes, i mostly followed the instructions and loosely traced the pattern pieces and ended up with my very own (insanely awesome) Mr. Grumpy in a Frog Suit!! but, i didn't stop there. after all, it's craft book month, and you know what they say... craft big or go home!

after Mr. Grumpy in a Frog Suit was all stitched up, he got to go on some fabulous adventures! for a whole weekend, he traveled where we did and the whole gnats family had lots of fun taking photos and writing up the story of Mr. Grumpy in a Frog Suit's adventure. lucky for you, we've written the whole thing up into an eBook (craft book month goes full circle!!), and it's available for you as a free download.


you can download your copy of "the adventures of Mr. Grumpy in a Frog Suit" right here!! i hope that your kiddos enjoy reading about his adventures as much as mine enjoyed documenting them. plus, how awesome is that painting by Brenna? this truly was a project that the whole family enjoyed.


the month-long Craft Book Month celebration includes a crafty contest, free patterns and prizes, and inspirational craft book posts from these bloggers:

Monday 9/2: Fabric Mutt / LRstitched
Tuesday 9/3: Stitch This! The Martingale Blog / Stitched in Color
Wednesday 9/4: Fabric Seeds / Pile O Fabric
Thursday 9/5: The Feisty Redhead / Rae Gun Ramblings
Friday 9/6: Sew-Fantastic / Clover + Violet
Saturday 9/7: A Prairie Sunrise / Small Town Stitcher

Monday 9/9: Hopeful Threads / Go To Sew
Tuesday 9/10: The Sewing Rabbit Sewing Mama RaeAnna
Wednesday 9/11: Marci Girl Designs / imagine gnats
Thursday 9/12: Sew Sweetness / amylouwhosews
Friday 9/13: Lindsay Sews / 13 Spools
Saturday 9/14: Inspire Me Grey / Angela Yosten 

Monday 9/16: Sew Very / Craftside
Tuesday 9/17: The Littlest Thistle / CraftFoxes

visit Craft Buds and link up your craft book project september 1-30, and you'll automatically be entered to win some fantastic prizes from the Craft Book Month sponsors! no time to make a project? you can also follow Craft Buds all month long for your chance to comment and win some new sewing and quilting books for your library.

i can't wait to hear what you think about the first gnats family production :) don't forget to download your eBook here.

happy stitching!


sewing: shirring the bess top

$
0
0
are you looking for a way to combine the ease and comfort of the bess topwith a more fitted silhouette? well, you're in luck! today, the fabulous Katie from Kadiddlehopper is sharing a great tutorial that will help you customize your bess top with shirring.


but first, let's discuss... this girls's sewing skills are way impressive! check out this button-up blouse and pencil skirt, just one of many outfits that, if i didn't know better, would surely make me think, "you didn't make that!" (which is, incidentally, what i thought when i first met Katie and found out she made the jeans and fitted top she was wearing). and how about this bess top that Katie made during pattern testing? fabulous.

a tool box full of sewing skills aside, today's post proves that sometimes simple changes can make a big impact. hop on over to Kadiddlehopper to check out Katie's Bess Top: Shirred Up, in which she uses a simple strand of elastic thread to transform the bess top.

new to shirring? check out my shirring with elastic thread tutorial here.

happy stitching!


sewing: adding contrast trim to the bess top

$
0
0
ready for some more lovely versions of the bess top from another of my pattern testers? today, Emma of Hello Beautiful and Fiskateers is sharing how to add contrast trim to the arms and neckline.


Emma set a resolution in 2012 to make herself one garment/month (love that idea!) and it was so fun to see the things she made... like this hoodie that i've been crushing on for, oh boy, um over a year now? yeesh. recently she stitched up this Hawthorn Dress, and you might have seen her earlier this week sharing this Miz Mozelle dress on the Spoonflower blog.

what is so great about the contrast trim that Emma added to her bess top is that it doesn't even require any extra steps in making the pattern. sometimes the simplest ideas really are genius! head over to the Fiskateers blog to see how she did it.

happy stitching!


Viewing all 906 articles
Browse latest View live